[2] ROOTパッケージのダウンロード
- ROOT のホームページのリストの中から「Download」をクリックする。
- Pro, version 5.34/07*recommended* をクリックする。
- 自分のOSに対応した binary file(例:root_v5.34.07.Linux-slc5_amd64-gcc4.3.tar.gz) をhomeディレクトリにダウンロードする。10分くらいかかる。 Windows上のcygwinのときはroot_v5.32.00.win32gcc-gcc-4.3.tar.gz を使った。しかしX windowが使えなかった(2013.4.30)。 ROOT解体新書 に参考説明あり。
- 自分のhome deiectoryにダウンロードしたファイルがあるか $ ls -lで確認する。
-rwxr-xr-x 1 user名 None 59189085 Apr 17 08:19 root_v5.34.07.Linux-slc5_amd64-gcc4.3.tar.gz*
などと出てきてファイルサイズは59189085byteであることがわかる。 - $ tar zxvf root_v5.34.07.Linux-slc5_amd64-gcc4.3.tar.gz(.....rootくらいまでタイプした後Tabキーを押す)で解凍・展開する。1分程度かかる。
- $ ls -F で root/ というdirectoryが新たに出来ていることを確認する(-Fとするとdirectoryには/がつく)。
- $ mv root / でroot/をdirectory treeのトップに移動する。$ ls -F / とすると
   bin/  dev/   home/  proc/  sbin/  tmp/  var/

   etc/  lib/   root/  srv/   usr/
などと出てきてroot/がtop directoryに移ったことを確認する。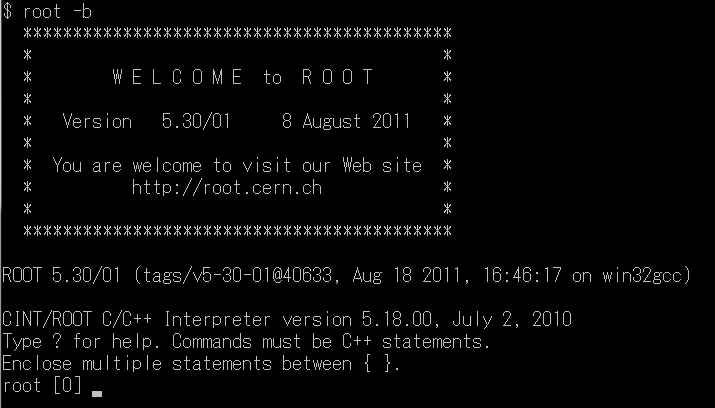
- Setting the Environment Variablesに従ってROOTの環境設定がLinux起動時に自動的にセットされるように、自分のホームページにあるシェル起動ファイル (たとえば.bashrc)の最後に以下のコマンドを追加する:
source /root/bin/thisroot.sh - Linuxを再起動して$ printenv LD_LIBRARY_PATH でLD_LIBRARY_PATHの値が
/root/libになっていることを確認する。 - $ root -b で ROOT を立ち上げると右図のようなROOT起動メッセージが出る。-b はbatch modeを指定し、graphic displayを必要としない。X Windowを起動できない場合にはこのモードを利用する。
- $ .q でROOTを終了する。
[3] ROOTの起動/終了とROOTコマンド例
- startx(またはxinit)で X window を立ち上げる。このようなX window画面が出る。(Windows Vistaでは時々失敗することがあるので何度か繰り返す。)
- root とタイプしてROOTを立ち上げる。右の人魚図がX Window上に出て起動メッセージが見えれば成功です。人魚図は5秒間で消える。$ root -lとすると起動画面はスキップされる。

- root[0]というプロンプトが出るので、コマンドを直接タイプする。このようにROOTではC++インタプリタ(CINT)による対話形式でのコマンド実行が可能である。
Draw() コマンドで右図のようなヒストグラムが描かれる。Print("test.png")では描いたc1キャンパスをファイルtest.pngに落としているので、X-Windowが起動できずroot -bで入った場合にはこのファイルを他の方法で開いて見ることができる。root[0] h = new TH1F("h","title",10,0.,20.); root[1] h -> Fill(2.8); root[2] h -> Fill(12.5,3); root[3] h -> Draw(); root[4] c1 -> Print("test.png"); - .q とタイプしてROOTを終える。
[4] マクロを使ってヒストグラムをプロットする
対話形式でROOTコマンドをタイプしていたのでは能率が悪い。この演習では以下すべてマクロを作って実行する。- テキストエディターでマクロファイル test.C を作る:
{ h = new TH1F("h","title",10,0.,20.); h -> Fill(2.8); h -> Fill(12.5,3); h -> Draw(); c1 -> Print("test.png"); } - マクロの実行:ROOTを起動してから
.x test.C
とタイプするとマクロが実行され上と同じプロットが出る。 - この例のようにデフォルトではヒストグラムの背景が灰色になってしまう。プロットスタイルを統一するためにLHCアトラス実験グループが使っている標準スタイルを設定する。
- rootから出る。
- 自分のhome directoryにRootUtilsというdirectoryを作る(cd ~ とmkdir RootUtilsで)。
- RootUtilsに AtlasStyle.C と rootlogon.C をコピーする。
- 自分のhome directoryに .rootrc というファイルを置く。

- 再びrootに入って同じマクロを実行する。背景が白色に変わりタイトルや統計表示がなくなっているはず。
- X軸、Y軸のタイトルを書いてみる:マクロ test.C のDraw()コマンドの前に
h->SetXTitle("Temperature");
h->SetYTitle("number");
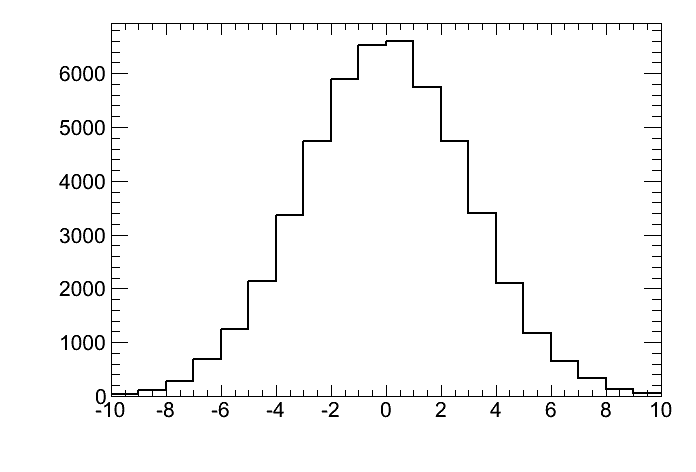
の2行を加えてからマクロを実行すると右図のプロットが得られる。 - マクロの例:Gauss.C -> その結果 | Landau.C -> その結果
- プロットのファイル保存方法:
- プロットが載っている c1キャンバスのFileコラムでSave Asを選び、pngなどのファイルタイプを指定しファイル名を記入する。
- マクロの中からでは、Draw()実行の後に c1->Print("fileName.png"); を実行する。
[5] データ入力:テキスト形式のデータを読み込んでプロットする
- まず ofstream を使ってテキスト形式のデータを作る。例えば上記のマクロ(Landau.C)に次のコードを加える:
ofstream fout("data.txt"); for (int i = 1 ; i < 101 ; i++) { fout << h1->GetXaxis()->GetBinCenter(i) << " " << h1->GetBinContent(i) << endl; } fout.close(); - 変更したマクロをROOTで実行する。テキスト形式のデータファイル data.txt が新しく作られたことを確認する。
- data.txt を読み込んでヒストグラムをプロットするマクロを作る。
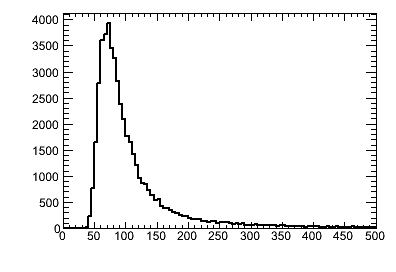
ここで{ c1 = new TCanvas("c1","c1 title", 200, 100, 400, 300); h1 = new TH1F("h1","h1 title",100,0., 500.); // ifstream fin("data.txt"); double x,y; while (fin >> x >> y ){ h1 -> Fill(x,y); } fin.close(); h1 -> Draw(); c1->Print("plot_data.png"); }while (fin >> x >> y ){......}は入力ファイルfinにデータがある限り読み続けて{.....}内を実行する部分で、この演習ではすべてこの入力方式を用いる。 - マクロをroot上で実行すると右図のプロットが出る。
[6] TGraph:グラフを作ってプロットする
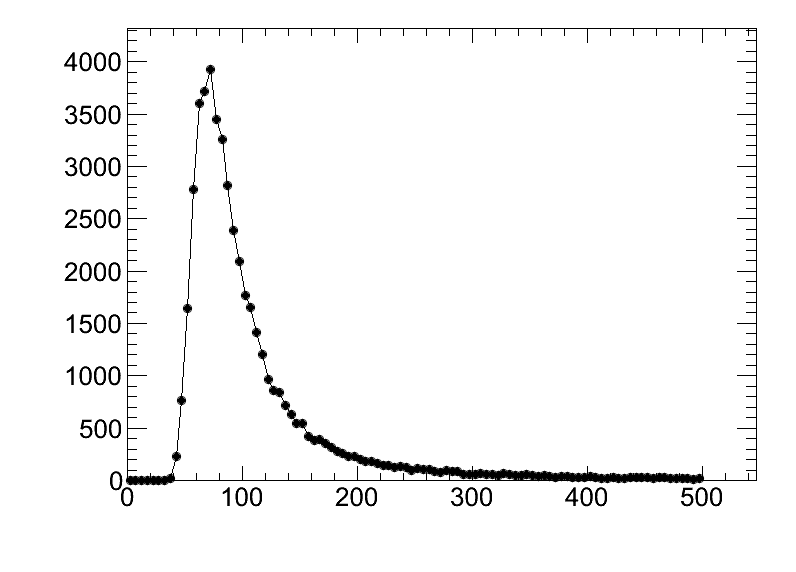
- ヒストグラムを作らずデータポイントを直接プロットするグラフ(TGraphクラス)は大変有用である。
{ c1 = new TCanvas("c1","c1 title", 200, 100, 800, 600); int n=0; double x[2000], y[2000]; ifstream fin("data.txt"); while (fin >> x[n] >> y[n] ) { if( n == 1999) break; n++; } fin.close(); g1 = new TGraph(n, x, y); g1 -> Draw("ALP"); //A=軸を描く,L=線でつなぐ,P=点で表示 c1->Print("plotGraph.png"); } - このマクロを作ってroot上で実行すると右図のプロットが出る。